 1:48
1:48
2023-09-10 01:55
 2:50
2:50
2:50
2023-11-17 23:46
 11:27
11:27
11:27
2022-03-20 14:39
 1:40:01
1:40:01
2026-05-28 16:01
 2:43:40
2:43:40
2026-05-30 20:20
 3:17:26
3:17:26
2026-03-30 09:58
 1:32:57
1:32:57
2026-05-28 17:00
 47:20
47:20
47:20
2026-05-30 18:00
 20:46
20:46
20:46
2026-03-09 04:55
 1:07:23
1:07:23
2026-05-15 10:46
 2:42:53
2:42:53
2026-05-19 21:15
 1:52:06
1:52:06
2026-05-29 20:00
 1:03:26
1:03:26
2026-05-30 11:03
 15:43
15:43
15:43
2026-05-30 23:49
 1:03:33
1:03:33
2026-05-29 06:10
 3:50:16
3:50:16
2024-08-19 15:47
 1:29:42
1:29:42
2025-07-12 18:00
 1:36:54
![Дана Лахова - Найдём нашу любовь (Премьера клипа 2026)]() 2:10
2:10
![Группа КАРОЛИНА - Розовые краски (Премьера клипа 2026)]() 4:06
4:06
![Руслан Добрый - Итальянка (Премьера клипа 2026)]() 2:14
2:14
![Рустам Нахушев - Загубила (Премьера клипа 2026)]() 3:31
3:31
![Соня Белькевич, КРЕСТОВ - Станцуем (Премьера клипа 2026)]() 3:25
3:25
![SHAXO, ILIMA - Чувства (Премьера клипа 2026)]() 2:34
2:34
![Кямал Узденов - До боли до безумия (Премьера клипа 2026)]() 2:41
2:41
![Хуршида Намазбаева - Сени дея (Премьера клипа 2026)]() 4:17
4:17
![Enrasta - Адьёс (Премьера клипа 2026)]() 3:45
3:45
![Ислам Итляшев - Мужское сердце (Премьера клипа 2026)]() 3:24
3:24
![ЕГОР КРИД & ARTIK & ASTI - KARMA (Премьера клипа 2026)]() 2:59
2:59
![Соня Белькевич - Давай, танцуй (Премьера клипа 2026)]() 3:40
3:40
![Джатдай - Болит моя душа (Премьера клипа 2026)]() 2:14
2:14
![Arujan - Koz tiydime (Премьера клипа 2026)]() 3:24
3:24
![Фати Царикаева - Моё лето (Премьера клипа 2026)]() 2:22
2:22
![Murat Gamidov - Лилия (Премьера клипа 2026)]() 2:34
2:34
![Артур Бесаев - Словно волк (Премьера клипа 2026)]() 3:32
3:32
![Гоша Куценко, Юлия Пак - Твоя я (Премьера клипа 2026)]() 4:01
4:01
![Сергей Одинцов - Моя недотрога (Премьера клипа 2026)]() 3:40
3:40
![Рейсан Магомедкеримов - Судьба связала (Премьера клипа 2026)]() 3:10
3:10
![Мортал Комбат 2 | Mortal Kombat II (2026)]() 1:46:02
1:46:02
![Грандиозная подделка | Il falsario (2025)]() 1:55:41
1:55:41
![Главы государств | Heads of State (2025)]() 1:56:16
1:56:16
![Чумовая пятница 2 | Freakier Friday (2025)]() 1:50:38
1:50:38
![Острые козырьки: Бессмертный человек | Peaky Blinders: The Immortal Man (2026)]() 1:54:08
1:54:08
![В чужой шкуре | Swapped (2026)]() 1:41:49
1:41:49
![Супер Марио: Галактическое кино | The Super Mario Galaxy Movie (2026)]() 1:38:05
1:38:05
![Последствия | Outcome (2026)]() 1:23:53
1:23:53
![28 лет спустя: Часть II. Храм костей | 28 Years Later: The Bone Temple (2026)]() 1:49:24
1:49:24
![Зомби по имени Шон | Shaun of the Dead (2004)]() 1:39:31
1:39:31
![Прыгуны | Hoppers (2026)]() 1:36:21
1:36:21
![Хищный рывок | Thrash (2026)]() 1:26:13
1:26:13
![Эта штука работает? | Is This Thing On? (2026)]() 2:00:44
2:00:44
![Джо едет в колледж | Joe's College Road Trip (2026)]() 1:51:29
1:51:29
![Смертельно прекрасна | Pretty Lethal (2026)]() 1:30:46
1:30:46
![Я иду искать 2 | Ready or Not 2: Here I Come (2026)]() 1:47:56
1:47:56
![Удачи, веселья, не сдохни | Good Luck, Have Fun, Don't Die (2025)]() 2:14:31
2:14:31
![Пицца фильм | Pizza Movie (2026)]() 1:37:12
1:37:12
![На помощь! | Send Help (2026)]() 1:53:00
1:53:00
![Крик 7 | Scream 7 (2026)]() 1:53:59
1:53:59
![Шахерезада. Нерассказанные истории Сезон 1]() 23:53
23:53
![Салон дядюшки Брэда]() 1:02
1:02
![Кадеты Баданаму Сезон 1]() 11:50
11:50
![Корги по имени Моко. Новый питомец]() 3:28
3:28
![МиниФорс Сезон 1]() 13:12
13:12
![Корги по имени Моко. Домашние животные]() 1:13
1:13
![Псэмми. Пять детей и волшебство Сезон 1]() 12:17
12:17
![Пакман в мире привидений]() 21:37
21:37
![Игрушечный полицейский Сезон 1]() 7:19
7:19
![Рэй и пожарный патруль Сезон 1]() 13:27
13:27
![Отряд А. Игрушки-спасатели]() 13:06
13:06
![Кай и ключи прошлого]() 0:00
0:00
![Монсики]() 6:30
6:30
![Сандра - сказочный детектив Сезон 1]() 13:52
13:52
![Мартышкины]() 7:10
7:10
![Сборники «Простоквашино»]() 1:07:28
1:07:28
![Панда и петушок Лука]() 12:12
12:12
![Сборники «Оранжевая корова»]() 1:05:17
1:05:17
![Панда и Антилопа]() 12:08
12:08
![Синдбад и семь галактик Сезон 1]() 10:23
10:23
![Мир в огне (все серии) 4K]() 12:26:36
12:26:36
![Барбоскины. Сезон 1. Серия 1. Пчёлка]() 5:38
5:38
![Сборник Новогодняя Десятка - Уральские Пельмени]() 1:19:08
1:19:08
![Спартак: Дом Ашура. 1 сезон, 1 серия]() 58:27
58:27
![Зверополис | Zootopia (2016)]() 1:48:48
1:48:48
![Клипы 90-х. Русский сборник хитов]() 1:29:27
1:29:27
![Аватар 3: Пламя и пепел фильм, 2025]() 3:09:06
3:09:06
![Форсаж 6 | Furious 6 (2013)]() 2:11:07
2:11:07
![Сборник Синий Трактор]() 57:36
57:36
![Свои. Баллада о войне (2025)]() 1:29:27
1:29:27
![Три Кота 🐱 Сборник серий подряд | Смотреть онлайн развивающие мультики и игры для детей и малышей]() 3:16:51
3:16:51
![Сборник Топ 20 Номеров за 2024 год - Уральские Пельмени]() 2:52:30
2:52:30
![Форсаж 9 | F9 (2021)]() 2:22:56
2:22:56
![Женщина лёгкого похудения - Уральские Пельмени]() 1:12:19
1:12:19
![Инна Вальтер - Дымом лечилась (Исповедь хулиганки)]() 7:04
7:04
![Ми–Ми–Мишки 💫 Звездная история 🙃 Все серии ✨ Мультики для детей]() 2:10:31
2:10:31
![Малыш. / 2026./ Россия / Боевик Драма Война]() 1:49:28
1:49:28
![MAUR - Полетела (Премьера клипа 2025)]() 2:53
2:53
![Рыцарь семи королевств. Все серии]() 3:28:06
3:28:06
![КОРОЛЬ и ШУТ /Сборник видеоклипов/]() 51:49
51:49
1:36:54

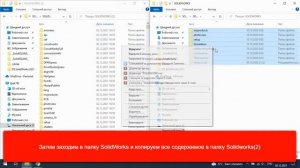
Скачать Видео с Рутуба по ссылке
| 640x360 | ||
| 1280x720 | ||
| 1920x1080 |
 2:10
2:10
2026-05-12 12:35
 4:06
4:06
2026-05-24 15:36
 2:14
2:14
2026-05-24 15:19
 3:31
3:31
2026-05-21 20:27
 3:25
3:25
2026-04-30 11:44
 2:34
2:34
2026-05-21 14:31
 2:41
2:41
2026-04-29 11:40
 4:17
4:17
2026-04-27 13:24
 3:45
3:45
2026-04-29 14:24
 3:24
3:24
2026-05-15 09:58
 2:59
2:59
2026-04-27 17:01
 3:40
3:40
2026-05-22 10:17
 2:14
2:14
2026-05-10 15:00
 3:24
3:24
2026-05-16 13:20
 2:22
2:22
2026-05-15 10:20
 2:34
2:34
2026-04-29 11:20
 3:32
3:32
2026-05-21 11:40
 4:01
4:01
2026-05-21 11:24
 3:40
3:40
2026-05-15 10:04
 3:10
3:10
2026-04-29 11:37
0/0
 1:46:02
2026-05-18 11:14
 1:55:41
2026-02-26 14:41
 1:56:16
2026-05-07 15:07
 1:50:38
2026-05-20 08:38
 1:54:08
2026-03-21 11:57
 1:41:49
2026-05-06 10:44
 1:38:05
2026-04-12 21:37
 1:23:53
2026-04-17 14:43
 1:49:24
2026-02-19 14:08
 1:39:31
2026-02-16 01:07
 1:36:21
2026-03-27 13:35
 1:26:13
2026-04-29 20:33
 2:00:44
2026-05-04 16:12
 1:51:29
2026-02-26 14:41
 1:30:46
2026-03-28 23:09
 1:47:56
2026-04-12 17:20
 2:14:31
2026-03-12 23:32
 1:37:12
2026-04-06 12:20
 1:53:00
2026-03-27 14:10
 1:53:59
2026-04-22 11:21
0/0
2021-09-22 23:25
 1:02
1:02
2026-05-07 16:57
2021-09-22 21:17
 3:28
3:28
2025-01-09 17:01
2021-09-23 00:15
 1:13
1:13
2024-11-29 14:40
2021-09-22 22:23
 21:37
21:37
2024-11-28 17:35
2021-09-22 21:03
2021-09-22 23:51
 13:06
13:06
2024-11-28 16:30
 0:00
0:00
2026-05-31 04:02
 6:30
6:30
2022-03-29 19:16
2021-09-22 20:39
 7:10
7:10
2025-12-30 18:33
 1:07:28
2026-04-02 13:30
 12:12
12:12
2024-11-29 14:21
 1:05:17
2025-07-15 11:22
 12:08
12:08
2025-06-10 14:59
2021-09-22 23:09
0/0
 12:26:36
2025-11-14 19:42
 5:38
5:38
2023-12-25 15:26
 1:19:08
2026-01-01 13:59
 58:27
58:27
2025-12-08 12:06
 1:48:48
2024-12-16 19:01
 1:29:27
2024-01-12 11:40
 3:09:06
2025-12-26 16:56
 2:11:07
2023-04-25 22:52
 57:36
57:36
2024-11-13 13:06
 1:29:27
2026-04-20 10:31
 3:16:51
2025-10-03 19:48
 2:52:30
2025-01-13 14:00
 2:22:56
2023-04-25 23:06
 1:12:19
2025-04-18 22:01
 7:04
7:04
2018-07-11 11:26
 2:10:31
2024-01-17 17:34
 1:49:28
2026-04-23 21:12
 2:53
2:53
2025-04-24 09:53
 3:28:06
2026-02-24 11:12
 51:49
51:49
2022-09-14 19:48
0/0