 1:50
1:50
2023-11-18 10:45
 2:11:45
2:11:45
2026-06-10 01:17
 2:02:45
2:02:45
2026-06-15 09:59
 1:09:37
1:09:37
2025-12-16 11:32
 55:28
55:28
55:28
2026-05-21 11:41
 46:47
46:47
46:47
2026-06-15 02:39
 1:25:28
1:25:28
2026-06-09 22:58
 2:15:17
2:15:17
2026-05-19 12:58
 33:38
33:38
33:38
2026-06-10 13:05
 31:26
31:26
31:26
2026-06-14 16:50
 2:09:45
2:09:45
2026-06-15 07:58
 52:48
52:48
52:48
2026-06-12 02:35
 2:41:41
2:41:41
2025-03-06 11:45
 38:54
38:54
38:54
2025-01-06 16:17
 13:32
13:32
13:32
2026-06-15 11:36
 31:53
31:53
31:53
2026-06-15 06:45
 1:12:36
1:12:36
2026-06-08 16:49
 1:08:54
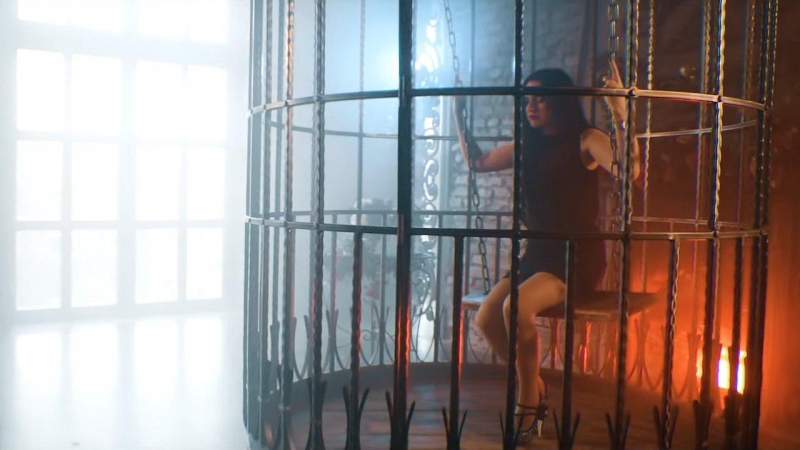
![Джатдай - Болит моя душа (Премьера клипа 2026)]() 2:14
2:14
![KIDA - MENIME (Official Video 2026)]() 2:44
2:44
![Arujan - Koz tiydime (Премьера клипа 2026)]() 3:24
3:24
![Соня Белькевич - Давай, танцуй (Премьера клипа 2026)]() 3:40
3:40
![Дана Лахова - Найдём нашу любовь (Премьера клипа 2026)]() 2:10
2:10
![Гоша Грачевский - Домой (Премьера клипа 2026)]() 2:50
2:50
![Артур Бесаев - Словно волк (Премьера клипа 2026)]() 3:32
3:32
![Гоша Куценко, Юлия Пак - Твоя я (Премьера клипа 2026)]() 4:01
4:01
![Ислам Мальсуйгенов и Зульфия Чотчаева - Путеводная (Премьера клипа 2026)]() 3:15
3:15
![Ислам Итляшев - Сердце (Премьера клипа 2026)]() 3:10
3:10
![Жасмин - Какое счастье (Премьера клипа 2026)]() 3:35
3:35
![Gran Error x ANTONIA - Levitate (Official Video 2026)]() 2:14
2:14
![Рустам Батербиев - Обернись (Премьера клипа 2026)]() 2:47
2:47
![Enrasta - Адьёс (Премьера клипа 2026)]() 3:45
3:45
![Юлия Имранова - Держи меня за руку (Премьера клипа 2026)]() 3:30
3:30
![Инна Вальтер - Звёздный вечер (Премьера клипа 2026)]() 3:48
3:48
![Группа КАРОЛИНА - Розовые краски (Премьера клипа 2026)]() 4:06
4:06
![Руслан Шанов, Amina T - Не верну я (Премьера клипа 2026)]() 2:31
2:31
![Murat Gamidov - По ночам (Премьера клипа 2026)]() 2:53
2:53
![Фати Царикаева - Моё лето (Премьера клипа 2026)]() 2:22
2:22
![Хищный рывок | Thrash (2026)]() 1:26:13
1:26:13
![Они придут за тобой | They Will Kill You (2026)]() 1:35:38
1:35:38
![Невеста! | The Bride! (2026)]() 2:06:44
2:06:44
![Зараза | Cold Storage (2025)]() 1:39:05
1:39:05
![Я иду искать 2 | Ready or Not 2: Here I Come (2026)]() 1:47:56
1:47:56
![Нормал | Normal (2025)]() 1:31:23
1:31:23
![Свадьба лучшего друга | My Best Friend's Wedding (1997)]() 1:44:58
1:44:58
![Мать Мария | Mother Mary (2026)]() 1:51:42
1:51:42
![Острые козырьки: Бессмертный человек | Peaky Blinders: The Immortal Man (2026)]() 1:54:08
1:54:08
![Компаньон | Companion (2025)]() 1:37:08
1:37:08
![Пицца фильм | Pizza Movie (2026)]() 1:37:12
1:37:12
![Пропеллер: Ночной рейс в один конец | Propeller: One-Way Night Coach (2026)]() 1:00:24
1:00:24
![Обитель зла 4: Жизнь после смерти 3D | Resident Evil: Afterlife (2010)]() 1:37:36
1:37:36
![Частная жизнь | Vie privée (2025)]() 1:47:21
1:47:21
![Военная машина | War Machine (2026)]() 1:49:24
1:49:24
![Восстание зловещих мертвецов | Evil Dead Rise (2023)]() 1:36:30
1:36:30
![Супер Марио: Галактическое кино | The Super Mario Galaxy Movie (2026)]() 1:38:05
1:38:05
![Необычайно умные создания | Remarkably Bright Creatures (2026)]() 1:54:04
1:54:04
![Майк и Ник и Ник и Элис | Mike & Nick & Nick & Alice (2026)]() 1:47:10
1:47:10
![Последствия | Outcome (2026)]() 1:23:53
1:23:53
![Мотофайтеры]() 13:10
13:10
![Чуч-Мяуч]() 7:04
7:04
![Полли Покет Сезон 1]() 21:30
21:30
![Кай и ключи прошлого]() 0:00
0:00
![Новогодние мультики – Союзмультфильм]() 7:04
7:04
![Оранжевая корова]() 6:30
6:30
![Тёплая анимация | Новая авторская анимация Союзмультфильма]() 7:17
7:17
![Тодли Великолепный!]() 3:15
3:15
![Киддеты]() 0:41
0:41
![Богатырята]() 11:00
11:00
![Корги по имени Моко. Защитники планеты]() 4:33
4:33
![Рэй и пожарный патруль Сезон 1]() 13:27
13:27
![Отважные мишки]() 13:00
13:00
![Отряд А. Игрушки-спасатели]() 13:06
13:06
![Кэрри и Суперкола]() 1:11
1:11
![Пластилинки]() 25:31
25:31
![Монсики]() 6:30
6:30
![Роботы-пожарные]() 12:31
12:31
![Сборники «Умка»]() 1:11:53
1:11:53
![Агент 203]() 21:08
21:08
![Барбоскины. Сезон 1. Серия 1. Пчёлка]() 5:38
5:38
![Форсаж 9 | F9 (2021)]() 2:22:56
2:22:56
![Аватар: Путь воды (2022)]() 3:12:39
3:12:39
![КЛИПЫ 90х ⭐Русский Сборник видеоклипов]() 2:54:39
2:54:39
![Инна Вальтер - Дымом лечилась (Исповедь хулиганки)]() 7:04
7:04
![Jakone и Kiliana - Асфальт (Mood Video)]() 2:50
2:50
![Bakhtin - Целовала (Премьера клипа 2023)]() 3:16
3:16
![50 клипов шансона]() 3:12:53
3:12:53
![Свои. Баллада о войне (2025)]() 1:29:27
1:29:27
![28 лет спустя: Часть II. Храм костей | 28 Years Later: The Bone Temple (2026)]() 1:49:24
1:49:24
![Штрафбат(1-11 серии) HD 2004]() 8:05:56
8:05:56
![Спартак: Дом Ашура. 1 сезон, 1 серия]() 58:27
58:27
![Дискотека 80-х 90-х Сборник видеоклипов (продолжение)]() 1:16:25
1:16:25
![Сборник Новогодняя Десятка - Уральские Пельмени]() 1:19:08
1:19:08
![Давид | David (2025)]() 1:49:18
1:49:18
![Дьявол носит Prada | The Devil Wears Prada (2006)]() 1:49:29
1:49:29
![Три Кота 🐱 Сборник серий подряд | Смотреть онлайн развивающие мультики и игры для детей и малышей]() 3:16:51
3:16:51
![Зверополис | Zootopia (2016)]() 1:48:48
1:48:48
![Бандитский Петербург. Все серии подряд. 60fps]() 66:54:01
66:54:01
![Дьявол носит Prada 2 | The Devil Wears Prada 2 (2026)]() 1:51:51
1:51:51
1:08:54

Скачать Видео с Рутуба по ссылке
| 256x144 | ||
| 640x360 |
 2:14
2:14
2026-05-10 15:00
 2:44
2:44
2026-05-10 12:47
 3:24
3:24
2026-05-16 13:20
 3:40
3:40
2026-05-22 10:17
 2:10
2:10
2026-05-12 12:35
 2:50
2:50
2026-06-04 09:50
 3:32
3:32
2026-05-21 11:40
 4:01
4:01
2026-05-21 11:24
 3:15
3:15
2026-05-30 11:43
 3:10
3:10
2026-06-14 11:29
 3:35
3:35
2026-05-16 13:07
 2:14
2:14
2026-05-16 13:24
 2:47
2:47
2026-05-26 11:05
 3:45
3:45
2026-04-29 14:24
 3:30
3:30
2026-05-26 11:32
 3:48
3:48
2026-05-15 10:08
 4:06
4:06
2026-05-24 15:36
 2:31
2:31
2026-05-16 13:10
 2:53
2:53
2026-05-21 14:27
 2:22
2:22
2026-05-15 10:20
0/0
 1:26:13
2026-04-29 20:33
 1:35:38
2026-05-20 08:37
 2:06:44
2026-04-22 11:21
 1:39:05
2026-05-07 15:06
 1:47:56
2026-04-12 17:20
 1:31:23
2026-05-27 11:57
 1:44:58
2026-06-01 17:17
 1:51:42
2026-05-26 13:06
 1:54:08
2026-04-13 12:20
 1:37:08
2026-05-07 15:10
 1:37:12
2026-04-06 12:20
 1:00:24
2026-06-03 11:48
 1:37:36
2026-06-01 17:18
 1:47:21
2026-04-09 22:40
 1:49:24
2026-03-10 12:44
 1:36:30
2026-05-06 14:10
 1:38:05
2026-04-12 21:37
 1:54:04
2026-05-12 16:55
 1:47:10
2026-04-03 12:10
 1:23:53
2026-04-17 14:43
0/0
 13:10
13:10
2024-11-27 14:57
 7:04
7:04
2022-03-29 15:20
2021-09-22 23:09
 0:00
0:00
2026-06-15 22:36
 7:04
7:04
2023-07-25 00:09
 6:30
6:30
2022-03-31 18:49
 7:17
7:17
2026-06-09 13:52
 3:15
3:15
2025-06-10 13:56
 0:41
0:41
2026-05-07 15:39
 11:00
11:00
2026-04-23 16:13
 4:33
4:33
2024-12-17 16:56
2021-09-22 23:51
 13:00
13:00
2024-11-29 13:39
 13:06
13:06
2024-11-28 16:30
 1:11
1:11
2026-05-07 16:33
 25:31
25:31
2022-04-01 14:30
 6:30
6:30
2022-03-29 19:16
2021-09-23 00:12
 1:11:53
2026-01-29 11:37
 21:08
21:08
2025-01-09 16:39
0/0
 5:38
5:38
2023-12-25 15:26
 2:22:56
2023-04-25 23:06
 3:12:39
2025-06-17 19:00
 2:54:39
2022-03-11 11:17
 7:04
7:04
2018-07-11 11:26
 2:50
2:50
2024-07-04 15:48
 3:16
3:16
2023-10-13 14:26
 3:12:53
2022-12-22 16:10
 1:29:27
2026-04-20 10:31
 1:49:24
2026-02-19 14:08
 8:05:56
2017-07-08 19:33
 58:27
58:27
2025-12-08 12:06
 1:16:25
2022-09-19 10:59
 1:19:08
2026-01-01 13:59
 1:49:18
2026-01-29 11:25
 1:49:29
2023-04-27 15:40
 3:16:51
2025-10-03 19:48
 1:48:48
2024-12-16 19:01
2023-05-15 17:30
 1:51:51
2026-05-06 10:53
0/0