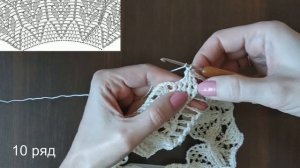
 1:17
1:17
2023-11-17 22:50
 8:29
8:29
8:29
2023-08-24 13:56
 1:12:09
1:12:09
2024-01-04 07:20
 10:00
10:00
10:00
2023-08-02 15:51
 1:13
1:13
1:13
2022-11-04 19:19
 3:36
3:36
3:36
2023-12-27 03:07
 10:59
10:59
10:59
2026-05-15 03:00
 3:05
3:05
3:05
2024-12-13 23:50
 44:11
44:11
44:11
2023-10-03 00:28
 34:03
34:03
34:03
2025-04-07 13:18
 6:38
6:38
6:38
2023-09-08 23:09
 13:12
13:12
13:12
2025-01-29 19:32
 19:13
19:13
19:13
2025-09-06 15:29
 7:44
7:44
7:44
2023-11-02 00:24
![DORO - All For Metal]() 4:04
4:04
 4:04
4:04
2018-07-02 16:32
 1:25
1:25
1:25
2026-06-14 11:09
 19:41
19:41
19:41
2026-04-21 09:29
 2:16
2:16
![Артур Бесаев - Словно волк (Премьера клипа 2026)]() 3:32
3:32
![Кямал Узденов - До боли до безумия (Премьера клипа 2026)]() 2:41
2:41
![Рейсан Магомедкеримов - Роза алая (Премьера клипа 2026)]() 3:52
3:52
![Misty - Летай (Премьера клипа 2026)]() 2:30
2:30
![KIDA - MENIME (Official Video 2026)]() 2:44
2:44
![Соня Белькевич, КРЕСТОВ - Станцуем (Премьера клипа 2026)]() 3:25
3:25
![Arujan - Koz tiydime (Премьера клипа 2026)]() 3:24
3:24
![Люся Чеботина - По барабану (Премьера клипа 2026)]() 3:16
3:16
![Бахтавар - Бизнес Леди (Премьера клипа 2026)]() 2:28
2:28
![Xhensila – Gjuma (Official Video 2026)]() 2:18
2:18
![Юлия Имранова - Держи меня за руку (Премьера клипа 2026)]() 3:30
3:30
![Гоша Грачевский - Домой (Премьера клипа 2026)]() 2:50
2:50
![Артур Халатов - Покайфуем (Премьера клипа 2026)]() 3:40
3:40
![Cvetocek7 - Близкий человек (Премьера клипа 2026)]() 2:46
2:46
![Дана Лахова - Найдём нашу любовь (Премьера клипа 2026)]() 2:10
2:10
![Ислам Итляшев - На руках (Премьера клипа 2026)]() 3:02
3:02
![INNA - Wizz Away (Official Video 2026)]() 2:14
2:14
![Рейсан Магомедкеримов - Судьба связала (Премьера клипа 2026)]() 3:10
3:10
![NAIMAN - Королева (Премьера клипа 2026)]() 3:02
3:02
![Ярослав Леонов - Майская роза (Премьера клипа 2026)]() 3:14
3:14
![Сестра | Siseuteo (2026)]() 1:26:45
1:26:45
![Микки 17 | Mickey 17 (2025)]() 2:16:60
2:16:60
![Пицца фильм | Pizza Movie (2026)]() 1:37:12
1:37:12
![Вершина | Apex (2026)]() 1:35:30
1:35:30
![Мортал Комбат 2 | Mortal Kombat II (2026)]() 1:46:02
1:46:02
![На помощь! | Send Help (2026)]() 1:53:00
1:53:00
![Компаньон | Companion (2025)]() 1:37:08
1:37:08
![Полный такос | Operation Taco Gary's (2026)]() 1:26:14
1:26:14
![Острые козырьки: Бессмертный человек | Peaky Blinders: The Immortal Man (2026)]() 1:54:08
1:54:08
![Напоминание о нём | Reminders of Him (2026)]() 1:54:16
1:54:16
![Острые козырьки: Бессмертный человек | Peaky Blinders: The Immortal Man (2026)]() 1:54:08
1:54:08
![Зараза | Cold Storage (2025)]() 1:39:05
1:39:05
![Удачи, веселья, не сдохни | Good Luck, Have Fun, Don't Die (2025)]() 2:14:31
2:14:31
![Мумия | The Mummy (2026)]() 2:15:22
2:15:22
![Чумовая пятница 2 | Freakier Friday (2025)]() 1:50:38
1:50:38
![Мать Мария | Mother Mary (2026)]() 1:51:42
1:51:42
![В чужой шкуре | Swapped (2026)]() 1:41:49
1:41:49
![Эта штука работает? | Is This Thing On? (2026)]() 2:00:44
2:00:44
![Частная жизнь | Vie privée (2025)]() 1:47:21
1:47:21
![Необычайно умные создания | Remarkably Bright Creatures (2026)]() 1:54:04
1:54:04
![Синдбад и семь галактик Сезон 1]() 10:23
10:23
![Корги по имени Моко. Новый питомец]() 3:28
3:28
![Забавные медвежата]() 13:00
13:00
![Сборники «Умка»]() 1:11:53
1:11:53
![Тёплая анимация | Новая авторская анимация Союзмультфильма]() 7:17
7:17
![Люк - путешественник во времени]() 1:19:50
1:19:50
![Сборники «Зебра в клеточку»]() 45:30
45:30
![Команда Дино Сезон 1]() 12:08
12:08
![Пип и Альба. Приключения в Соленой Бухте! Сезон 1]() 11:02
11:02
![Пакман в мире привидений]() 21:37
21:37
![Кэрри и Супер Кола]() 1:08
1:08
![Богатырята]() 11:00
11:00
![Супер Зак]() 11:38
11:38
![Майло]() 0:25
0:25
![Паровозик Титипо]() 13:42
13:42
![Ну, погоди! Каникулы]() 7:09
7:09
![Чуч-Мяуч]() 7:04
7:04
![Последний книжный магазин]() 11:20
11:20
![Команда Дино. Исследователи Сезон 2]() 13:26
13:26
![Пип и Альба Сезон 1]() 11:02
11:02
![Алдан (2025)]() 1:38:04
1:38:04
![КЛИПЫ 90х ⭐Русский Сборник видеоклипов]() 2:54:39
2:54:39
![Сборник Топ 20 Номеров за 2024 год - Уральские Пельмени]() 2:52:30
2:52:30
![Дискотека 80-х 90-х Сборник видеоклипов (продолжение)]() 1:16:25
1:16:25
![КОРОЛЬ и ШУТ /Сборник видеоклипов/]() 51:49
51:49
![MAUR - Полетела (Премьера клипа 2025)]() 2:53
2:53
![Jazzdauren - Дарите женщинам цветы]() 3:09
3:09
![Ми–Ми–Мишки 💫 Звездная история 🙃 Все серии ✨ Мультики для детей]() 2:10:31
2:10:31
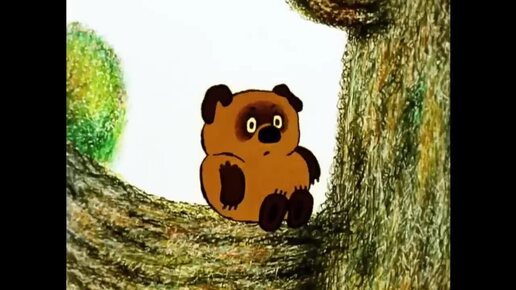
![Винни-Пух. 1969 год.]() 41:23
41:23
![Барбоскины. Сезон 1. Серия 1. Пчёлка]() 5:38
5:38
![Лунтик | Танцы 💃💃💃 Сборник мультиков для детей]() 46:30
46:30
![Аватар: Путь воды (2022)]() 3:12:39
3:12:39
![ТОП ЛУЧШИХ КЛИПОВ ШАНСОНА - Слушать шансон лучшее.]() 3:48:45
3:48:45
![Инна Вальтер - Дымом лечилась (Исповедь хулиганки)]() 7:04
7:04
![Смешарики (большой сборник)]() 3:25:27
3:25:27
![_*ДискотекА 80-90х ВиДео АлЬбом Лучшие.*_]() 2:40:60
2:40:60
![28 лет спустя: Часть II. Храм костей | 28 Years Later: The Bone Temple (2026)]() 1:49:24
1:49:24
![Зверополис | Zootopia (2016)]() 1:48:48
1:48:48
![Форсаж 9 | F9 (2021)]() 2:22:56
2:22:56
![Гордость и предубеждение | Pride & Prejudice (2005)]() 2:08:21
2:08:21
2:16

Скачать Видео с Рутуба по ссылке
| 256x144 | ||
| 426x240 | ||
| 640x360 | ||
| 854x480 |
 3:32
3:32
2026-05-21 11:40
 2:41
2:41
2026-04-29 11:40
 3:52
3:52
2026-05-09 18:11
 2:30
2:30
2026-06-02 13:00
 2:44
2:44
2026-05-10 12:47
 3:25
3:25
2026-04-30 11:44
 3:24
3:24
2026-05-16 13:20
 3:16
3:16
2026-06-04 09:46
 2:28
2:28
2026-06-11 11:23
 2:18
2:18
2026-05-10 12:39
 3:30
3:30
2026-05-26 11:32
 2:50
2:50
2026-06-04 09:50
 3:40
3:40
2026-05-16 13:14
 2:46
2:46
2026-05-24 15:25
 2:10
2:10
2026-05-12 12:35
 3:02
3:02
2026-06-04 09:55
 2:14
2:14
2026-06-14 11:15
 3:10
3:10
2026-04-29 11:37
 3:02
3:02
2026-05-26 10:55
 3:14
3:14
2026-05-02 00:31
0/0
 1:26:45
2026-03-27 13:34
 2:16:60
2026-05-07 15:07
 1:37:12
2026-04-06 12:20
 1:35:30
2026-04-30 16:00
 1:46:02
2026-05-18 11:14
 1:53:00
2026-03-27 14:10
 1:37:08
2026-05-07 15:10
 1:26:14
2026-04-07 11:13
 1:54:08
2026-03-21 11:57
 1:54:16
2026-05-28 20:15
 1:54:08
2026-04-13 12:20
 1:39:05
2026-05-07 15:06
 2:14:31
2026-03-12 23:32
 2:15:22
2026-05-21 11:56
 1:50:38
2026-05-20 08:38
 1:51:42
2026-05-26 13:06
 1:41:49
2026-05-06 10:44
 2:00:44
2026-05-04 16:12
 1:47:21
2026-04-09 22:40
 1:54:04
2026-05-12 16:55
0/0
2021-09-22 23:09
 3:28
3:28
2025-01-09 17:01
 13:00
13:00
2024-12-02 13:15
 1:11:53
2026-01-29 11:37
 7:17
7:17
2026-06-09 13:52
 1:19:50
2024-12-17 16:00
 45:30
45:30
2025-12-11 18:53
2021-09-22 22:29
2021-09-22 23:36
 21:37
21:37
2024-11-28 17:35
 1:08
1:08
2026-05-18 16:32
 11:00
11:00
2026-04-23 16:13
2021-09-22 22:07
 0:25
0:25
2026-04-10 13:19
 13:42
13:42
2024-11-28 14:12
 7:09
7:09
2026-04-11 10:00
 7:04
7:04
2022-03-29 15:20
 11:20
11:20
2025-09-12 10:05
2021-09-22 22:54
2021-09-22 23:37
0/0
 1:38:04
2026-03-26 23:45
 2:54:39
2022-03-11 11:17
 2:52:30
2025-01-13 14:00
 1:16:25
2022-09-19 10:59
 51:49
51:49
2022-09-14 19:48
 2:53
2:53
2025-04-24 09:53
 3:09
3:09
2024-05-30 14:13
 2:10:31
2024-01-17 17:34
 41:23
41:23
2023-11-19 12:01
 5:38
5:38
2023-12-25 15:26
 46:30
46:30
2024-08-05 22:22
 3:12:39
2025-06-17 19:00
2026-02-02 14:57
 7:04
7:04
2018-07-11 11:26
 3:25:27
2025-01-24 05:04
 2:40:60
2024-03-18 17:25
 1:49:24
2026-02-19 14:08
 1:48:48
2024-12-16 19:01
 2:22:56
2023-04-25 23:06
 2:08:21
2023-05-03 20:56
0/0