 0:49
0:49
2024-02-07 11:42
 2:19
2:19
2:19
2024-01-21 18:20
 16:20
16:20
16:20
2024-02-07 11:49
 3:15
3:15
3:15
2024-05-04 02:31
 1:12
1:12
1:12
2025-04-30 15:45
 2:01
2:01
2:01
2024-02-07 13:54
 1:05
1:05
1:05
2025-08-08 16:01
 2:57
2:57
2:57
2024-05-29 23:16
 2:09
2:09
2:09
2024-06-21 19:13
 1:14:08
1:14:08
2024-06-15 20:58
 4:14
4:14
4:14
2025-04-28 20:43
 0:45
0:45
0:45
2023-09-28 09:22
 34:58
34:58
34:58
2023-08-27 15:11
 11:13
11:13
11:13
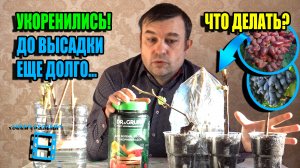
ПРАВИЛЬНАЯ ПОСАДКА УКОРЕНЕННЫХ ЧЕРЕНКОВ ВИНОГРАДА (САЖЕНЦЕВ) В КОНТЕЙНЕРЫ. СЕВЕРНЫЙ ВИНОГРАДНИК 23-5
2023-02-05 19:00
 13:04
13:04
13:04
2023-07-24 09:14
 33:52
33:52
33:52
2023-10-18 12:27
 1:29
1:29
1:29
2023-09-10 17:02
 1:03:14
![Зара - Прерванный полет (Премьера клипа 2025)]() 5:08
5:08
![ESCO - За тобой (Премьера клипа 2025)]() 2:13
2:13
![Бобур Ахмад - Куролмаслар (Премьера клипа 2025)]() 3:33
3:33
![Бьянка - Бренд (Премьера клипа 2025)]() 2:29
2:29
![Бонухон & Сардорбек Машарипов - Шанс (Премьера клипа 2025)]() 3:28
3:28
![Сергей Сухачёв - Розовый туман (Премьера клипа 2025)]() 3:13
3:13
![Зара - Танго о двух влюбленных кораблях (Премьера клипа 2025)]() 3:10
3:10
![Алмас Багратиони - Сила веры (Премьера клипа 2025)]() 3:18
3:18
![NIKA DUBIK, Winter Spirit - Искры (Премьера клипа 2025)]() 4:27
4:27
![Рустам Нахушев, Зульфия Чотчаева - Каюсь (Премьера клипа 2025)]() 3:20
3:20
![KhaliF - Где бы не был я (Премьера клипа 2025)]() 2:53
2:53
![Алим Аталиков - Как царица (Премьера клипа 2025)]() 3:25
3:25
![Мухит Бобоев - Маликам (Премьера клипа 2025)]() 3:18
3:18
![Жасурбек Мирзажонов - Суймаганга суйкалдим (Премьера клипа 2025)]() 5:45
5:45
![Анжелика Агурбаш - Утро (Премьера клипа 2025)]() 3:33
3:33
![Мужик из СИБИРИ (Александр Конев) - Не прощу (Премьера клипа 2025)]() 2:39
2:39
![Илёс Юнусий - Каранг она якинларим (Премьера клипа 2025)]() 3:36
3:36
![Alex Lim, Игорь Крутой - Вокзал (Премьера клипа 2025)]() 3:32
3:32
![Руслан Гасанов, Роман Ткаченко - Друзьям (Премьера клипа 2025)]() 3:20
3:20
![Gulinur - Nishatar (Official Video 2025)]() 3:40
3:40
![Одноклассницы | St. Trinian's (2007)]() 1:36:32
1:36:32
![Когда ты закончишь спасать мир | When You Finish Saving the World (2022)]() 1:27:40
1:27:40
![Вечеринка только начинается | The Party's Just Beginning (2018)]() 1:31:20
1:31:20
![Свинтусы | The Twits (2025)]() 1:42:50
1:42:50
![Большое смелое красивое путешествие | A Big Bold Beautiful Journey (2025)]() 1:49:20
1:49:20
![Хани, не надо! | Honey Don't! (2025)]() 1:29:32
1:29:32
![Сверху вниз | Highest 2 Lowest (2025)]() 2:13:21
2:13:21
![Голос любви | Aline (2020)]() 2:05:43
2:05:43
![Храброе сердце | Braveheart (1995)]() 2:57:46
2:57:46
![Плохие парни 2 | The Bad Guys 2 (2025)]() 1:43:51
1:43:51
![Дикари | The Savages (2007)]() 1:54:19
1:54:19
![Государственный гимн | Americana (2025)]() 1:47:31
1:47:31
![Обитель | The Home (2025)]() 1:34:43
1:34:43
![Лос-Анджелес в огне | Kings (2017)]() 1:29:27
1:29:27
![Богомол | Samagwi (2025)]() 1:53:29
1:53:29
![Псы войны | Hounds of War (2024)]() 1:34:38
1:34:38
![Хищник | Predator (1987) (Гоблин)]() 1:46:40
1:46:40
![Супруги Роуз | The Roses (2025)]() 1:45:29
1:45:29
![Голый пистолет | The Naked Gun (2025)]() 1:26:24
1:26:24
![Положитесь на Пита | Lean on Pete (2017)]() 2:02:04
2:02:04
![Приключения Пети и Волка]() 11:00
11:00
![МиниФорс Сезон 1]() 13:12
13:12
![Тёплая анимация | Новая авторская анимация Союзмультфильма]() 10:21
10:21
![Люк - путешественник во времени]() 1:19:50
1:19:50
![Ну, погоди! Каникулы]() 7:09
7:09
![Истории Баданаму Сезон 1]() 10:02
10:02
![Панда и петушок Лука]() 12:12
12:12
![Сандра - сказочный детектив Сезон 1]() 13:52
13:52
![Сборники «Оранжевая корова»]() 1:05:15
1:05:15
![Агент 203]() 21:08
21:08
![Приключения Тайо]() 12:50
12:50
![Панда и Антилопа]() 12:08
12:08
![Команда Дино Сезон 2]() 12:31
12:31
![Последний книжный магазин]() 11:20
11:20
![Школьный автобус Гордон]() 12:34
12:34
![Шахерезада. Нерассказанные истории Сезон 1]() 23:53
23:53
![Игрушечный полицейский Сезон 1]() 7:19
7:19
![Врумиз. 1 сезон]() 13:10
13:10
![Пип и Альба Сезон 1]() 11:02
11:02
![Чемпионы]() 7:35
7:35
1:03:14

Скачать видео
| 256x144 | ||
| 426x240 | ||
| 640x360 | ||
| 854x480 | ||
| 1280x720 | ||
| 1920x1080 |
 5:08
5:08
2025-10-31 12:50
 2:13
2:13
2025-10-31 12:20
 3:33
3:33
2025-11-02 10:17
 2:29
2:29
2025-10-25 12:48
 3:28
3:28
2025-10-24 11:20
 3:13
3:13
2025-10-24 12:18
 3:10
3:10
2025-10-27 10:52
 3:18
3:18
2025-10-24 12:09
 4:27
4:27
2025-10-31 16:00
 3:20
3:20
2025-10-30 10:39
 2:53
2:53
2025-10-28 12:16
 3:25
3:25
2025-10-29 10:18
 3:18
3:18
2025-11-02 10:30
 5:45
5:45
2025-10-27 13:06
2025-11-02 10:06
 2:39
2:39
2025-10-30 11:00
 3:36
3:36
2025-11-02 10:25
 3:32
3:32
2025-10-31 15:50
 3:20
3:20
2025-10-25 12:59
 3:40
3:40
2025-10-31 13:38
0/0
 1:36:32
2025-08-28 15:32
 1:27:40
2025-08-27 17:17
 1:31:20
2025-08-27 17:17
 1:42:50
2025-10-21 16:19
 1:49:20
2025-10-21 22:50
 1:29:32
2025-09-15 11:39
 2:13:21
2025-09-09 12:49
 2:05:43
2025-08-27 18:01
 2:57:46
2025-08-31 01:03
 1:43:51
2025-08-26 16:18
 1:54:19
2025-08-27 18:01
 1:47:31
2025-09-17 22:22
 1:34:43
2025-09-09 12:49
 1:29:27
2025-08-28 15:32
 1:53:29
2025-10-01 12:06
 1:34:38
2025-08-28 15:32
 1:46:40
2025-10-07 09:27
 1:45:29
2025-10-23 18:26
 1:26:24
2025-09-03 13:20
 2:02:04
2025-08-27 17:17
0/0
 11:00
11:00
2022-04-01 17:59
2021-09-23 00:15
 10:21
10:21
2025-09-11 10:05
 1:19:50
2024-12-17 16:00
 7:09
7:09
2025-08-19 17:20
2021-09-22 21:29
 12:12
12:12
2024-11-29 14:21
2021-09-22 20:39
 1:05:15
2025-09-30 13:45
 21:08
21:08
2025-01-09 16:39
 12:50
12:50
2024-12-17 13:25
 12:08
12:08
2025-06-10 14:59
2021-09-22 22:40
 11:20
11:20
2025-09-12 10:05
 12:34
12:34
2024-12-02 14:42
2021-09-22 23:25
2021-09-22 21:03
2021-09-24 16:00
2021-09-22 23:37
 7:35
7:35
2025-11-01 09:00
0/0