 6:25
6:25
2023-11-17 03:35
 29:16
29:16
29:16
2024-12-12 08:11
 1:56:22
1:56:22
2026-03-15 21:00
 10:11:37
10:11:37
2025-04-07 07:03
 11:03:06
11:03:06
2025-10-20 06:19
 2:42:49
2:42:49
2024-01-30 15:40
 2:07:59
2:07:59
2026-02-18 21:10
 4:52:26
4:52:26
2024-09-08 13:36
 4:02:06
4:02:06
2025-01-04 02:00
 11:52:60
11:52:60
2025-01-24 09:38
 2:41:09
2:41:09
2025-11-14 18:15
 3:08:44
3:08:44
2025-06-28 22:00
 11:57:38
11:57:38
2025-04-23 06:55
 2:50:57
2:50:57
2025-05-03 17:08
 9:22:58
9:22:58
2025-12-23 08:07
 2:40:56
2:40:56
2023-09-10 18:55
 3:01:48
3:01:48
2024-02-09 03:39
 41:50
41:50
![Артур Пирожков - Похудеем позже (Премьера клипа 2026)]() 2:53
2:53
![Рустам Батербиев - Пушка (Премьера 2026)]() 3:08
3:08
![Айна Гетегазова - Царь зверей (Премьера клипа 2026)]() 3:44
3:44
![NITI DILA - Запели капели (Премьера 2026)]() 2:14
2:14
![Игорь Балан - Бывшая (Премьера клипа 2026)]() 3:44
3:44
![Cvetocek7 - Проблема (Премьера клипа 2026)]() 2:29
2:29
![Азамат Пхешхов - Ты лето, ну а я зима (Премьера клипа 2026)]() 2:59
2:59
![Алёна Егорова - Оружие (Премьера клипа 2026)]() 3:23
3:23
![EDGAR - Букет из розовых тюльпанов (Премьера клипа 2026)]() 3:50
3:50
![Инна Вальтер - Мы друг другу никто (Премьера клипа 2026)]() 3:37
3:37
![Кирилл Туриченко - Королева любви (Премьера клипа 2026)]() 2:46
2:46
![Рустам Нахушев - Ландыши (Премьера клипа 2026)]() 4:08
4:08
![Хилола Хамидова - Хафа-Хафа (Премьера клипа 2026)]() 4:32
4:32
![ARTEE - Ну и пусть (Премьера клипа 2026)]() 4:12
4:12
![Dilnoz - Dilbarim (Official Video 2026)]() 6:03
6:03
![Клава Кока - Сто шагов назад (Премьера клипа 2026)]() 2:41
2:41
![Elvira T - Одинокая пантера (Премьера клипа 2026)]() 2:08
2:08
![Zhamil Turan - Оденьте женщину в любовь (Премьера клипа 2026)]() 3:23
3:23
![Яхё Носир - Согинасиз (Премьера клипа 2026)]() 4:42
4:42
![10AGE & Анет Сай - Пропадает (Премьера клипа 2026)]() 2:41
2:41
![Игра со смертью | Play Dead (2025)]() 1:12:23
1:12:23
![Тепло наших тел | Warm Bodies (2013)]() 1:37:49
1:37:49
![Примат | Primate (2025)]() 1:32:11
1:32:11
![Анаконда | Anaconda (2025)]() 1:38:55
1:38:55
![Элементарно | Elemental (2023)]() 1:41:31
1:41:31
![Сират | Sirât (2025)]() 1:54:52
1:54:52
![Носферату | Nosferatu (2024)]() 2:12:40
2:12:40
![Идеальная афера | Wildcat (2025)]() 1:39:16
1:39:16
![28 лет спустя: Часть II. Храм костей | 28 Years Later: The Bone Temple (2026)]() 1:49:24
1:49:24
![Тихое место: День первый | A Quiet Place: Day One (2024)]() 1:39:30
1:39:30
![Оскар шоу | Oscar Shaw (2025)]() 1:29:22
1:29:22
![Обитель зла 4: Жизнь после смерти | Resident Evil: Afterlife (2010)]() 1:37:36
1:37:36
![Давид | David (2025)]() 1:49:18
1:49:18
![Крипер | Keeper (2025)]() 1:38:41
1:38:41
![Удачи, веселья, не сдохни | Good Luck, Have Fun, Don't Die (2025)]() 2:14:31
2:14:31
![В мгновение ока | In the Blink of an Eye (2026)]() 1:34:15
1:34:15
![Миссия невыполнима: Финальная расплата | Mission: Impossible - The Final Reckoning (2025)]() 2:52:58
2:52:58
![Пункт назначения: Узы крови | Final Destination: Bloodlines (2025)]() 1:49:52
1:49:52
![Лило и Стич | Lilo & Stitch (2025)]() 1:49:28
1:49:28
![Грандиозная подделка | Il falsario (2025)]() 1:55:41
1:55:41
![Врумиз. 1 сезон]() 13:10
13:10
![Команда Дино Сезон 1]() 12:08
12:08
![Чуч-Мяуч]() 7:04
7:04
![Истории Баданаму Сезон 1]() 10:02
10:02
![Пластилинки]() 25:31
25:31
![МегаМен: Полный заряд Сезон 1]() 10:42
10:42
![Богатырята]() 11:00
11:00
![Кадеты Баданаму Сезон 1]() 11:50
11:50
![Крутиксы]() 11:00
11:00
![Панда и петушок Лука]() 12:12
12:12
![Сборники «Оранжевая корова»]() 1:05:17
1:05:17
![Поймай Тинипин! Королевство эмоций]() 12:24
12:24
![Роботы-пожарные]() 12:31
12:31
![Пакман в мире привидений]() 21:37
21:37
![Пип и Альба. Приключения в Соленой Бухте! Сезон 1]() 11:02
11:02
![МиниФорс]() 0:00
0:00
![Сборники «Умка»]() 1:11:53
1:11:53
![Отряд А. Игрушки-спасатели]() 13:06
13:06
![Хвостатые песенки]() 7:00
7:00
![Шахерезада. Нерассказанные истории Сезон 1]() 23:53
23:53
![Хищник: Планета смерти | Predator: Badlands (2025)]() 1:47:25
1:47:25
![КАМИН 4К 🔥 FIREPLACE 4K | Звуки камина и Треск огня]() 2:00:00
2:00:00
![MAUR - Полетела (Премьера клипа 2025)]() 2:53
2:53
![Спартак: Дом Ашура. 1 сезон, 1 серия]() 58:27
58:27
![Форсаж 9 | F9 (2021)]() 2:22:56
2:22:56
![Ну, погоди!]() 3:21:43
3:21:43
![Бандитский Петербург. Все серии подряд. 60fps]() 66:54:01
66:54:01
![Кей-поп-охотницы на демонов | KPop Demon Hunters (2025)]() 1:39:41
1:39:41
![Цып-Цып - Мультики для детей - Все серии подряд!]() 1:45:28
1:45:28
![ТОП ЛУЧШИХ КЛИПОВ ШАНСОНА - Слушать шансон лучшее.]() 3:48:45
3:48:45
![Лунтик | Танцы 💃💃💃 Сборник мультиков для детей]() 46:30
46:30
![Снова в деле (2025) Netflix]() 1:54:23
1:54:23
![Рыцарь семи королевств. Все серии]() 3:28:06
3:28:06
![Аватар: Путь воды (2022)]() 3:12:39
3:12:39
![_*ДискотекА 80-90х ВиДео АлЬбом Лучшие.*_]() 2:40:60
2:40:60
![Максим ФАДЕЕВ feat. Григорий ЛЕПС - Орлы или вороны ft.и]() 4:38
4:38
![ANNA ASTI - ЦАРИЦА ( Премьера клипа 2023 )]() 4:01
4:01
![Сборник Новогодняя Десятка - Уральские Пельмени]() 1:19:08
1:19:08
![Штрафбат(1-11 серии) HD 2004]() 8:05:56
8:05:56
![Дева и дракон | Damsel (2024)]() 1:49:38
1:49:38
41:50

Скачать Видео с Рутуба / RuTube
| 256x144 | ||
| 432x232 | ||
| 640x360 | ||
| 856x480 | ||
| 1280x720 |
 2:53
2:53
2026-02-28 20:01
 3:08
3:08
2026-02-26 10:16
 3:44
3:44
2026-03-04 10:27
 2:14
2:14
2026-03-13 12:04
 3:44
3:44
2026-03-03 12:20
 2:29
2:29
2026-03-03 12:53
 2:59
2:59
2026-03-13 11:54
 3:23
3:23
2026-03-18 10:32
 3:50
3:50
2026-03-06 13:17
 3:37
3:37
2026-03-13 12:11
 2:46
2:46
2026-03-09 10:49
 4:08
4:08
2026-02-26 15:33
 4:32
4:32
2026-03-14 12:16
 4:12
4:12
2026-03-04 10:34
 6:03
6:03
2026-03-14 12:20
 2:41
2:41
2026-02-27 12:25
 2:08
2:08
2026-02-23 13:25
 3:23
3:23
2026-03-06 13:58
 4:42
4:42
2026-02-26 10:20
 2:41
2:41
2026-02-28 19:53
0/0
 1:12:23
2026-03-06 18:16
 1:37:49
2026-02-16 08:53
 1:32:11
2026-02-17 21:38
 1:38:55
2026-01-28 12:07
 1:41:31
2026-01-23 18:43
 1:54:52
2026-01-26 14:35
 2:12:40
2026-01-23 18:44
 1:39:16
2026-03-06 18:16
 1:49:24
2026-02-19 14:08
 1:39:30
2026-01-23 18:43
 1:29:22
2026-01-26 14:34
 1:37:36
2026-02-25 19:41
 1:49:18
2026-01-29 11:25
 1:38:41
2026-03-06 19:13
 2:14:31
2026-03-12 23:32
 1:34:15
2026-03-01 21:54
 2:52:58
2026-01-23 19:12
 1:49:52
2026-01-23 18:44
 1:49:28
2026-01-23 18:44
 1:55:41
2026-02-26 14:41
0/0
2021-09-24 16:00
2021-09-22 22:29
 7:04
7:04
2022-03-29 15:20
2021-09-22 21:29
 25:31
25:31
2022-04-01 14:30
2021-09-22 21:43
2026-01-12 13:08
2021-09-22 21:17
 11:00
11:00
2022-07-25 18:59
 12:12
12:12
2024-11-29 14:21
 1:05:17
2025-07-15 11:22
 12:24
12:24
2024-11-27 13:24
2021-09-23 00:12
 21:37
21:37
2024-11-28 17:35
2021-09-22 23:36
 0:00
0:00
2026-03-19 15:51
 1:11:53
2026-01-29 11:37
 13:06
13:06
2024-11-28 16:30
 7:00
7:00
2025-06-01 11:15
2021-09-22 23:25
0/0
Скачать популярное видео
Популярное видео
 1:47:25
2025-11-27 03:58
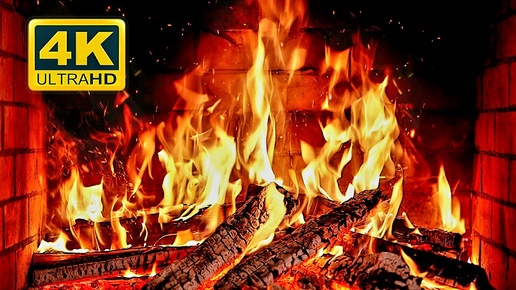 2:00:00
2024-12-19 00:00
 2:53
2:53
2025-04-24 09:53
 58:27
58:27
2025-12-08 12:06
 2:22:56
2023-04-25 23:06
 3:21:43
2024-08-29 02:17
2023-05-15 17:30
 1:39:41
2025-10-29 16:30
 1:45:28
2022-06-06 09:02
2026-02-02 14:57
 46:30
46:30
2024-08-05 22:22
 1:54:23
2025-01-18 20:05
 3:28:06
2026-02-24 11:12
 3:12:39
2025-06-17 19:00
 2:40:60
2024-03-18 17:25
 4:38
4:38
2017-12-19 08:20
 4:01
4:01
2023-10-12 11:54
 1:19:08
2026-01-01 13:59
 8:05:56
2017-07-08 19:33
 1:49:38
2024-03-12 00:19
0/0