 2:17:46
2026-03-15 23:40
 10:11:37
10:11:37
2025-04-07 07:03
 11:03:06
11:03:06
2025-10-20 06:19
 2:41:09
2:41:09
2025-11-14 18:15
 2:07:59
2:07:59
2026-02-18 21:10
 2:42:49
2:42:49
2024-01-30 15:40
 3:12:39
3:12:39
2023-12-21 11:54
 2:32:19
2:32:19
2023-09-10 18:25
 2:17:40
2:17:40
2025-05-29 22:28
 3:01:48
3:01:48
2024-02-09 03:39
 11:52:60
11:52:60
2025-01-24 09:38
 2:40:56
2:40:56
2023-09-10 18:55
 4:23:18
4:23:18
2024-02-16 17:06
 4:02:06
4:02:06
2025-01-04 02:00
 2:50:57
2:50:57
2025-05-03 17:08
 2:32:28
2:32:28
2025-11-07 15:49
 2:48:30
2:48:30
2023-12-23 12:24
 3:08:44
![Жалолиддин Ахмадалиев - Ёлгон дунё (Премьера клипа 2026)]() 3:44
3:44
![Игорь Кибирев - Разведённые мосты (Премьера клипа 2026)]() 3:22
3:22
![Надежда Мельянцева – Человеку нужно (Премьера клипа 2026)]() 3:23
3:23
![ARTEE - Ну и пусть (Премьера клипа 2026)]() 4:12
4:12
![Alexia - Două Linii (Official Video 2026)]() 2:38
2:38
![CHEPIKK - 5 минут назад (Премьера 2026)]() 3:09
3:09
![Айна Гетегазова - Царь зверей (Премьера клипа 2026)]() 3:44
3:44
![Zhamil Turan - Оденьте женщину в любовь (Премьера клипа 2026)]() 3:23
3:23
![Cvetocek7 - Проблема (Премьера клипа 2026)]() 2:29
2:29
![MIRAVI - Снегопад (Премьера клипа 2026)]() 4:12
4:12
![Инна Вальтер - Мы друг другу никто (Премьера клипа 2026)]() 3:37
3:37
![BITTUEV - Ранила (Премьера клипа 2026)]() 3:25
3:25
![Dilnoz - Dilbarim (Official Video 2026)]() 6:03
6:03
![Аюбхон Усмонов - Асал (Премьера клипа 2026)]() 3:28
3:28
![С 8 Марта, милые, красивые женщины]() 5:01
5:01
![ARTIX - Колдует-гадает (Премьера клипа 2026)]() 3:41
3:41
![SVETLAYA - А и я (Премьера 2026)]() 2:18
2:18
![Кирилл Туриченко - Королева любви (Премьера клипа 2026)]() 2:46
2:46
![NITI DILA - Запели капели (Премьера 2026)]() 2:14
2:14
![Максим АРШАВИН - Горько (Премьера клипа 2026)]() 3:09
3:09
![Дом у дороги | Road House (2024)]() 2:03:29
2:03:29
![Новокаин | Novocaine (2025)]() 1:49:34
1:49:34
![Охотник и охотница | Hunting Grounds (2025)]() 1:29:24
1:29:24
![Одинокие волки | Wolfs (2024)]() 1:47:12
1:47:12
![Идеальная афера | Wildcat (2025)]() 1:39:16
1:39:16
![Лакомый кусок | The Rip (2025)]() 1:52:50
1:52:50
![Хамнет: История, вдохновившая «Гамлета» | Hamnet (2025)]() 2:05:47
2:05:47
![Тепло наших тел | Warm Bodies (2013)]() 1:37:49
1:37:49
![Обитель зла 2: Апокалипсис | Resident Evil: Apocalypse (2004)]() 1:37:50
1:37:50
![Семья в аренду | Rental Family (2025)]() 1:49:55
1:49:55
![Обитель зла 4: Жизнь после смерти | Resident Evil: Afterlife (2010)]() 1:37:36
1:37:36
![Игра со смертью | Play Dead (2025)]() 1:12:23
1:12:23
![Анаконда | Anaconda (2025)]() 1:38:55
1:38:55
![Обитель зла 3 | Resident Evil: Extinction (2010)]() 1:34:09
1:34:09
![Сират | Sirât (2025)]() 1:54:52
1:54:52
![Побег из плена | Prisoner of War (2025)]() 1:52:58
1:52:58
![Без обид | No Hard Feelings (2023)]() 1:43:51
1:43:51
![Дикий робот | The Wild Robot (2024)]() 1:41:50
1:41:50
![Опасные связи | Bone Lake (2025)]() 1:30:07
1:30:07
![Zомбилэнд: Контрольный выстрел | Zombieland: Double Tap (2019)]() 1:39:05
1:39:05
![Сборники «Умка»]() 1:11:53
1:11:53
![МиниФорс Сезон 1]() 13:12
13:12
![Корги по имени Моко. Новый питомец]() 3:28
3:28
![Зебра в клеточку]() 6:30
6:30
![Новогодние мультики – Союзмультфильм]() 7:04
7:04
![Простоквашино]() 6:30
6:30
![Последний книжный магазин]() 11:20
11:20
![Умка]() 7:11
7:11
![Богатырята]() 11:00
11:00
![Роботы-пожарные]() 12:31
12:31
![Карли – искательница приключений. Древнее королевство]() 13:00
13:00
![Пакман в мире привидений]() 21:37
21:37
![Школьный автобус Гордон]() 12:34
12:34
![Крутиксы]() 11:00
11:00
![Люк - путешественник во времени]() 1:19:50
1:19:50
![Сборники «Приключения Пети и Волка»]() 1:28:31
1:28:31
![Команда Дино. Исследователи Сезон 2]() 13:26
13:26
![Отряд А. Игрушки-спасатели]() 13:06
13:06
![Тёплая анимация | Новая авторская анимация Союзмультфильма]() 10:46
10:46
![Супер Дино]() 12:41
12:41
![ЛУЧШИЕ ВИДЕО КЛИПЫ 80-90-х. Звёзды Эстрады. Золотые хиты. Супердискотека.]() 2:56:03
2:56:03
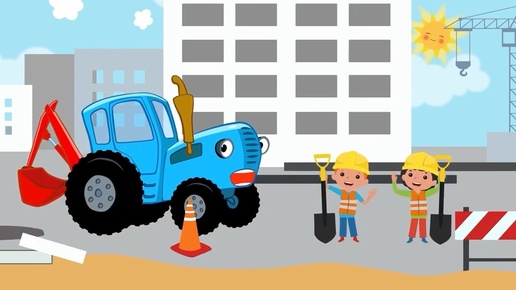
![Сборник Синий Трактор]() 57:36
57:36
![_*ДискотекА 80-90х ВиДео АлЬбом Лучшие.*_]() 2:40:60
2:40:60
![СваТы 1 сезон(все серии)]() 2:17:36
2:17:36
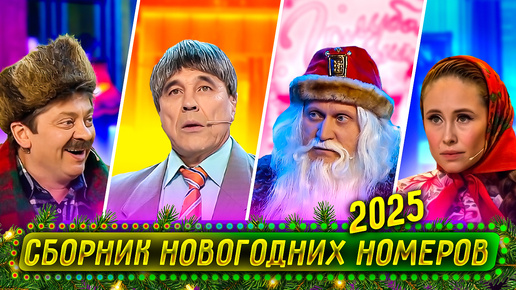
![Сборник Новогодних Номеров 2024 - Уральские Пельмени]() 3:18:51
3:18:51
![Барбоскины 1-30]() 2:21:36
2:21:36
![Снова в деле (2025) Netflix]() 1:54:23
1:54:23
![Jazzdauren - Дарите женщинам цветы]() 3:09
3:09
![Рыцарь семи королевств. Все серии]() 3:28:06
3:28:06
![Цып-Цып - Мультики для детей - Все серии подряд!]() 1:45:28
1:45:28
![Винни-Пух. 1969 год.]() 41:23
41:23
![ХИТЫ 2025 ТАНЦЕВАЛЬНАЯ МУЗЫКА СБОРНИК]() 1:41:18
1:41:18
![Сборник Топ 20 Номеров за 2024 год - Уральские Пельмени]() 2:52:30
2:52:30
![Дьявол носит Prada | The Devil Wears Prada (2006)]() 1:49:29
1:49:29
![Bakhtin - Целовала (Премьера клипа 2023)]() 3:16
3:16
![ТОП ЛУЧШИХ КЛИПОВ ШАНСОНА - Слушать шансон лучшее.]() 3:48:45
3:48:45
![Три Кота 🐱 Сборник серий подряд | Смотреть онлайн развивающие мультики и игры для детей и малышей]() 3:16:51
3:16:51
![Мир в огне (все серии) 4K]() 12:26:36
12:26:36
![Зверополис | Zootopia (2016)]() 1:48:48
1:48:48
![Свои. Баллада о войне [2025, драма, военный]]() 1:29:27
1:29:27
3:08:44

Скачать Видео с Рутуба / RuTube
| 230x144 | ||
| 576x360 | ||
| 1152x720 | ||
| 1728x1080 |
 3:44
3:44
2026-02-22 22:48
 3:22
3:22
2026-02-25 09:55
 3:23
3:23
2026-03-13 11:40
 4:12
4:12
2026-03-04 10:34
 2:38
2:38
2026-02-20 10:00
 3:09
3:09
2026-03-14 14:36
 3:44
3:44
2026-03-04 10:27
 3:23
3:23
2026-03-06 13:58
 2:29
2:29
2026-03-03 12:53
 4:12
4:12
2026-02-23 13:14
 3:37
3:37
2026-03-13 12:11
 3:25
3:25
2026-02-28 19:57
 6:03
6:03
2026-03-14 12:20
 3:28
3:28
2026-02-25 09:33
 5:01
5:01
2026-03-08 09:55
 3:41
3:41
2026-03-03 12:38
 2:18
2:18
2026-03-14 12:02
 2:46
2:46
2026-03-09 10:49
 2:14
2:14
2026-03-13 12:04
 3:09
3:09
2026-02-20 23:46
0/0
 2:03:29
2026-02-27 09:42
 1:49:34
2026-01-23 18:44
 1:29:24
2026-02-06 18:40
 1:47:12
2026-01-23 18:43
 1:39:16
2026-03-06 18:16
 1:52:50
2026-02-04 10:11
 2:05:47
2026-02-06 18:40
 1:37:49
2026-02-16 08:53
 1:37:50
2026-02-25 19:41
 1:49:55
2026-02-13 20:27
 1:37:36
2026-02-25 19:41
 1:12:23
2026-03-06 18:16
 1:38:55
2026-01-28 12:07
 1:34:09
2026-02-25 19:41
 1:54:52
2026-01-26 14:35
 1:52:58
2026-01-26 14:34
 1:43:51
2026-01-23 18:44
 1:41:50
2026-01-23 18:44
 1:30:07
2026-02-06 18:40
 1:39:05
2026-02-16 01:07
0/0
 1:11:53
2026-01-29 11:37
2021-09-23 00:15
 3:28
3:28
2025-01-09 17:01
 6:30
6:30
2022-03-31 13:09
 7:04
7:04
2023-07-25 00:09
 6:30
6:30
2022-03-30 13:57
 11:20
11:20
2025-09-12 10:05
 7:11
7:11
2026-01-20 10:00
2026-01-12 13:08
2021-09-23 00:12
 13:00
13:00
2024-11-28 16:19
 21:37
21:37
2024-11-28 17:35
 12:34
12:34
2024-12-02 14:42
 11:00
11:00
2022-07-25 18:59
 1:19:50
2024-12-17 16:00
 1:28:31
2026-03-05 13:25
2021-09-22 22:54
 13:06
13:06
2024-11-28 16:30
 10:46
10:46
2022-06-07 11:02
 12:41
12:41
2024-11-28 12:54
0/0
Скачать популярное видео
Популярное видео
 2:56:03
2021-03-15 02:49
 57:36
57:36
2024-11-13 13:06
 2:40:60
2024-03-18 17:25
 2:17:36
2025-07-24 20:55
 3:18:51
2024-12-31 14:00
 2:21:36
2024-12-16 20:15
 1:54:23
2025-01-18 20:05
 3:09
3:09
2024-05-30 14:13
 3:28:06
2026-02-24 11:12
 1:45:28
2022-06-06 09:02
 41:23
41:23
2023-11-19 12:01
2024-06-25 00:21
 2:52:30
2025-01-13 14:00
 1:49:29
2023-04-27 15:40
 3:16
3:16
2023-10-13 14:26
2026-02-02 14:57
 3:16:51
2025-10-03 19:48
 12:26:36
2025-11-14 19:42
 1:48:48
2024-12-16 19:01
2025-04-11 14:51
0/0