 4:32
4:32
2023-08-21 19:32
 1:44
1:44
1:44
2024-11-08 05:51
 2:00:06
2:00:06
2026-01-26 21:00
 3:12:39
3:12:39
2023-12-21 11:54
 1:47:32
1:47:32
2025-12-24 09:18
 2:32:19
2:32:19
2023-09-10 18:25
 5:36
5:36
5:36
2026-01-15 01:44
 2:58:11
2:58:11
2023-09-20 15:09
 11:59:14
11:59:14
2025-12-11 08:06
 3:48:10
3:48:10
2023-09-18 01:16
 1:35:38
1:35:38
2026-01-30 10:57
 3:55:20
3:55:20
2023-11-30 23:17
 3:10:29
3:10:29
2025-12-20 10:48
 1:48:45
1:48:45
2024-01-23 13:26
 1:57:17
1:57:17
2025-12-20 21:00
 2:01:48
2:01:48
2023-12-14 11:09
 2:14:43
2:14:43
2023-09-26 22:33
 2:26:03
![Кравц - 99 проблем (Премьера клипа 2026)]() 2:30
2:30
![Шавкат Зулфикор - Жигарлар (Премьера клипа 2026)]() 5:53
5:53
![Илёс Юнусий - Менга ургатманг сиз кандай яшашни (Премьера клипа 2026)]() 3:43
3:43
![Арина Войт - Смелая (Премьера клипа 2026)]() 2:52
2:52
![Антон и Альфия - Январская вьюга (Премьера клипа 2026)]() 3:32
3:32
![Dabro - Зима, зима (Премьера клипа 2026)]() 3:17
3:17
![Ислам Итляшев - Боинг (Премьера клипа 2026)]() 2:42
2:42
![БАХТАВАР - В белом платье (Премьера клипа 2026)]() 3:17
3:17
![Гунеша - Юр кетамиз (Премьера клипа 2026)]() 3:13
3:13
![Эльчин Кулиев - Сладкие сказки (Премьера клипа 2026)]() 4:08
4:08
![Инна Вальтер - Ты любишь петь (Премьера клипа 2026)]() 3:49
3:49
![Андрей Храмов - Я приглашу тебя на танец (Премьера клипа 2026)]() 4:01
4:01
![Tural Everest, Руслан Добрый - Не хочу (Премьера клипа 2026)]() 2:46
2:46
![ARTIX - Последний снег (Премьера клипа 2026)]() 3:17
3:17
![Самир Санаев - Дилрабо (Премьера клипа 2026)]() 4:17
4:17
![Виктор Королёв - А ты яблоко ела (Премьера 2026)]() 3:44
3:44
![Tural Everest - Забыла (Премьера клипа 2026)]() 2:44
2:44
![Азамат Пхешхов, Руслан Шанов - Родная (Премьера клипа 2026)]() 3:25
3:25
![Syuzi Dzhaginian - Сегодня я плачу (Премьера клипа 2026)]() 2:57
2:57
![Ислам Мальсуйгенов - Ледяное сердце (Премьера клипа 2026)]() 2:30
2:30
![Гарри Поттер и Орден Феникса | Harry Potter and the Order of the Phoenix (2007)]() 2:18:19
2:18:19
![Астронавт | The Astronaut (2025)]() 1:30:31
1:30:31
![Мерв | Merv (2025)]() 1:46:56
1:46:56
![Претенденты | Challengers (2024)]() 2:11:42
2:11:42
![Голубая луна | Blue Moon (2025)]() 1:40:33
1:40:33
![Боже. Как. Смешно. | Oh. What. Fun. (2025)]() 1:47:58
1:47:58
![Побег из плена | Prisoner of War (2025)]() 1:52:58
1:52:58
![Гарри Поттер и узник Азкабана | Harry Potter and the Prisoner of Azkaban (2004)]() 2:21:46
2:21:46
![Элементарно | Elemental (2023)]() 1:41:31
1:41:31
![Точка замерзания | Dead of Winter (2025)]() 1:37:45
1:37:45
![Игры Биста. 2 сезон, 2 серия | Beast Games 2 season]() 58:23
58:23
![Гарри Поттер и Принц-полукровка | Harry Potter and the Half-Blood Prince (2009)]() 2:33:36
2:33:36
![Бегущий человек | The Running Man (2025)]() 2:16:29
2:16:29
![Гарри Поттер и Кубок огня | Harry Potter and the Goblet of Fire (2005)]() 2:37:09
2:37:09
![Фэкхем-Холл | Fackham Hall (2025)]() 1:37:17
1:37:17
![Один дома 2: Затерянный в Нью-Йорке | Home Alone 2: Lost in New York (1992)]() 2:00:06
2:00:06
![Злая. Часть 2 | Wicked: For Good (2025)]() 2:17:37
2:17:37
![Игры Биста. 2 сезон, 3 серия | Beast Games 2 season]() 57:01
57:01
![Отпуск на двоих | People We Meet on Vacation (2026)]() 1:57:55
1:57:55
![Гарри Поттер и Тайная комната | Harry Potter and the Chamber of Secrets (2002)]() 2:54:28
2:54:28
![Мартышкины]() 7:10
7:10
![Космический рейнджер Роджер Сезон 1]() 11:32
11:32
![Умка]() 7:11
7:11
![Пип и Альба Сезон 1]() 11:02
11:02
![Корги по имени Моко. Новый питомец]() 3:28
3:28
![Приключения Пети и Волка]() 11:00
11:00
![Тёплая анимация | Новая авторская анимация Союзмультфильма]() 10:46
10:46
![Зомби Дамб]() 5:14
5:14
![Псэмми. Пять детей и волшебство Сезон 1]() 12:17
12:17
![Карли – искательница приключений. Древнее королевство]() 13:00
13:00
![Команда Дино. Исследователи Сезон 1]() 13:10
13:10
![Игрушечный полицейский Сезон 1]() 7:19
7:19
![Рэй и пожарный патруль Сезон 1]() 13:27
13:27
![Корги по имени Моко. Домашние животные]() 1:13
1:13
![Лудлвилль]() 7:05
7:05
![Сандра - сказочный детектив Сезон 1]() 13:52
13:52
![Монсики]() 6:30
6:30
![Роботы-пожарные]() 12:31
12:31
![Супер Дино]() 12:41
12:41
![Чуч-Мяуч]() 7:04
7:04
2:26:03
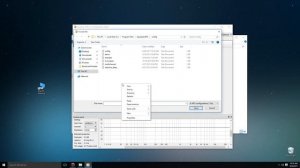
Скачать Видео с Рутуба / RuTube
| 426x240 | ||
| 640x360 | ||
| 854x480 | ||
| 1280x720 | ||
| 1920x1080 |
 2:30
2:30
2026-01-14 15:04
 5:53
5:53
2026-01-10 14:39
 3:43
3:43
2026-01-22 10:47
 2:52
2:52
2026-01-08 12:25
 3:32
3:32
2026-01-28 09:47
 3:17
3:17
2026-01-23 19:44
 2:42
2:42
2026-01-20 01:15
 3:17
3:17
2026-01-28 09:57
 3:13
3:13
2026-01-12 10:24
 4:08
4:08
2026-01-15 10:48
 3:49
3:49
2026-01-28 10:32
 4:01
4:01
2026-01-15 13:30
 2:46
2:46
2026-01-28 12:09
 3:17
3:17
2026-01-20 10:41
 4:17
4:17
2026-01-28 12:17
 3:44
3:44
2026-01-08 12:44
 2:44
2:44
2026-01-23 18:15
 3:25
3:25
2026-01-23 19:30
 2:57
2:57
2026-01-28 11:50
 2:30
2:30
2026-01-24 13:36
0/0
 2:18:19
2025-12-25 15:40
 1:30:31
2026-01-14 15:48
 1:46:56
2025-12-12 13:56
 2:11:42
2026-01-23 18:43
 1:40:33
2025-12-17 23:52
 1:47:58
2025-12-09 13:32
 1:52:58
2026-01-26 14:34
 2:21:46
2025-12-25 15:40
 1:41:31
2026-01-23 18:43
 1:37:45
2026-01-26 14:35
 58:23
58:23
2026-01-07 23:52
 2:33:36
2025-12-25 15:40
 2:16:29
2025-12-17 23:52
 2:37:09
2025-12-25 15:40
 1:37:17
2026-01-26 14:35
 2:00:06
2025-12-25 15:39
 2:17:37
2026-01-14 15:48
 57:01
57:01
2026-01-07 23:55
 1:57:55
2026-01-14 15:48
 2:54:28
2025-12-25 15:41
0/0
 7:10
7:10
2025-12-30 18:33
2021-09-22 21:49
 7:11
7:11
2026-01-20 10:00
2021-09-22 23:37
 3:28
3:28
2025-01-09 17:01
 11:00
11:00
2022-04-01 17:59
 10:46
10:46
2022-06-07 11:02
 5:14
5:14
2024-11-28 13:12
2021-09-22 22:23
 13:00
13:00
2024-11-28 16:19
2021-09-22 22:45
2021-09-22 21:03
2021-09-22 23:51
 1:13
1:13
2024-11-29 14:40
 7:05
7:05
2025-12-30 20:49
2021-09-22 20:39
 6:30
6:30
2022-03-29 19:16
2021-09-23 00:12
 12:41
12:41
2024-11-28 12:54
 7:04
7:04
2022-03-29 15:20
0/0