 5:54
5:54
2024-10-03 10:56
 1:13
1:13
1:13
2025-03-08 06:19
 5:40
5:40
5:40
2024-01-03 07:31
 0:45
0:45
0:45
2024-09-19 08:06
 1:11
1:11
1:11
2023-11-01 14:30
 2:23
2:23
2:23
2024-03-19 15:01
 2:45:00
2:45:00
2025-05-28 09:27
![You Belong To The World [Edit]](https://pic.rutubelist.ru/video/2025-01-26/ca/97/ca97b35fd4bd2c312ad788a5663ffd47.jpg?width=300) 0:32
0:32
0:32
2025-01-26 19:03
 4:30
4:30
4:30
2025-05-07 08:15
 24:39
24:39
24:39
2024-09-12 20:39
 4:30
4:30
4:30
2023-11-17 00:51
 6:50
6:50
6:50
2023-08-27 19:27
 8:23
8:23
8:23
2023-08-11 16:35
 4:53
4:53
4:53
2023-08-29 13:35
 3:08
3:08
3:08
2023-09-01 11:08
 6:15
6:15
6:15
2023-09-20 02:49
 6:17
6:17
6:17
2023-08-08 14:56
 2:41
2:41
![Игорь Кибирев - Пьяная ночь (Премьера клипа 2025)]() 3:08
3:08
![INSTASAMKA - AGENT GIRL (Премьера клипа 2025)]() 3:24
3:24
![ARTEE - Лети (Премьера клипа 2025)]() 3:13
3:13
![Азиз Абдуллох - Аллохнинг айтгани булади (Премьера клипа 2025)]() 3:40
3:40
![Премьера клипа! Игорь Крутой — Зонтик]() 4:00
4:00
![NAIMAN - Уникальная (Премьера клипа 2025)]() 2:37
2:37
![W24 - I Gotta Feeling]() 3:49
3:49
![Рустам Батербиев - Пора расстаться (Премьера клипа 2025)]() 2:38
2:38
![ARTIX, SHAXO - Дождь (Премьера клипа 2025)]() 5:23
5:23
![Премьера клипа! Ваня Дмитриенко - Настоящая]() 3:33
3:33
![Lx24 - Сберегу (Премьера клипа 2025)]() 2:57
2:57
![MARSO - Дура (Премьера клипа 2025)]() 3:05
3:05
![Анвар Нишонов - Тулкилар (Премьера клипа 2025)]() 3:38
3:38
![Азамат Ражабов - Отам (Премьера клипа 2025)]() 4:38
4:38
![Ислам Итляшев - Скандал (Премьера клипа 2025)]() 2:08
2:08
![Зафар Эргашов - Мусофирда каридим (Премьера клипа 2025)]() 4:58
4:58
![Anette - Erjanik em (Official Video 2025)]() 3:36
3:36
![ИЮЛА - Ты был прав (Премьера клипа 2025)]() 2:21
2:21
![MILEN - Украду тебя (Премьера 2025)]() 3:40
3:40
![Фаррух Хамраев - Отажоним булсайди (Премьера клипа 2025)]() 3:08
3:08
![Девушка из каюты №10 | The Woman in Cabin 10 (2025)]() 1:35:11
1:35:11
![Алиса в Стране чудес: Все части 1, 2 (фильмы)]() 4:14:09
4:14:09
![Миссия невыполнима: Финальная расплата (2025)]() 2:52:55
2:52:55
![Чумовая пятница (2003)]() 1:36:57
1:36:57
![Код 3 (2025)]() 1:39:52
1:39:52
![Порочный круг | Vicious (2025)]() 1:42:30
1:42:30
![Doom (2005) (Расширенная версия)]() 1:52:44
1:52:44
![101 далматинец (фильм, 1996) | Круэлла и далматинцы]() 2:12:42
2:12:42
![Неудержимые 3 (2014) 1080]() 2:06:27
2:06:27
![Волынь (2016)]() 2:28:56
2:28:56
![Плачущий убийца (1995)]() 1:41:57
1:41:57
![Токсичный мститель (2023)]() 1:42:11
1:42:11
![Макс Пэйн (2008) (Расширенная версия)]() 1:42:59
1:42:59
![Монстры: История Эда Гейна (2025) (мини-сериал)]() 7:26:60
7:26:60
![Первый день моей жизни]() 1:56:45
1:56:45
![101 далматинец: Все части 1, 2 (фильмы)]() 3:46:00
3:46:00
![Добыча (2022)]() 1:45:08
1:45:08
![Шафер напрокат (2015)]() 1:41:27
1:41:27
![Терминатор | The Terminator (1984) (Гоблин)]() 1:47:17
1:47:17
![Стив | Steve (2025)]() 1:33:34
1:33:34
![Земля до начала времён 3: В поисках воды (1995) / The Land Before Time III]()
 1:10:48
![Альфа и Омега: Клыкастая братва (2010) / Alpha and Omega]()
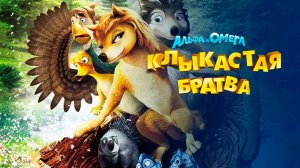 1:27:56
![Лоракс (2012) / The Lorax]()
 1:26:13
![Плохие парни 2 (2025) / The Bad Guys 2]()
 1:43:47
![Дорога домой (2021) / Back to the Outback]()
 1:31:40
![Земля до начала времён 12: Великий День птиц (2006) / The Land Before Time XII]()
 1:20:30
![Альфа и Омега 7: Большое обледенение (2016) / Alpha and Omega 7: The Big Fureeze]()
 45:06
45:06
![Девочки из Эквестрии. Пропуск за кулисы для Сансет (2018) / Equestria Girls. Sunset's Backstage Pass]()
 44:08
44:08
![Альфа и Омега 2: Приключения праздничного воя (2013) / Alpha and Omega 2: A Howl-iday Adventure]()
 45:08
45:08
![Смурфики в кино (2025) / Smurfs]()
 1:29:33
![Шевели ластами 2 (2012) / A Turtle's Tale 2: Sammy's Escape from Paradise]()
 1:32:45
![Волшебный парк Джун (2019) / Wonder Park]()
 1:25:17
![Земля до начала времён 4: Путешествие в Землю Туманов (1996) / The Land Before Time IV]()
 1:13:52
![Шерлок Гномс (2018) / Sherlock Gnomes]()
 1:26:19
![Плохие парни: Очень плохой праздник (2023) / The Bad Guys: A Very Bad Holiday]()
 22:30
22:30
![Науэль и волшебная книга (2020) / Nauel and the Magic Book]()
 1:37:06
![Земля до начала времён 9: Путешествие к Большой Воде (2002) / The Land Before Time IX]()
 1:14:38
![Земля до начала времён 11: Вторжение Мышезавров (2005) / The Land Before Time XI]()
 1:20:52
![Земля до начала времён 13: Сила дружбы (2007) / The Land Before Time XIII]()
 1:15:39
![Приключения Десперо (2008) / The Tale of Despereaux]()
 1:33:38
2:41

Скачать видео
| 256x136 | ||
| 426x224 | ||
| 640x338 | ||
| 854x450 | ||
| 1280x676 | ||
| 1920x1012 |
 3:08
3:08
2025-10-16 11:32
 3:24
3:24
2025-10-17 11:33
 3:13
3:13
2025-10-18 09:47
 3:40
3:40
2025-10-18 10:34
 4:00
4:00
2025-10-18 17:45
 2:37
2:37
2025-10-14 10:48
2025-10-12 18:28
 2:38
2:38
2025-10-16 11:06
 5:23
5:23
2025-10-14 11:01
 3:33
3:33
2025-10-18 17:45
 2:57
2:57
2025-10-11 12:26
 3:05
3:05
2025-10-17 11:37
 3:38
3:38
2025-10-11 12:45
 4:38
4:38
2025-10-11 12:52
 2:08
2:08
2025-10-14 10:40
 4:58
4:58
2025-10-18 10:31
 3:36
3:36
2025-10-18 10:11
 2:21
2:21
2025-10-18 10:16
 3:40
3:40
2025-10-15 11:15
 3:08
3:08
2025-10-18 10:28
0/0
 1:35:11
2025-10-13 12:06
 4:14:09
2025-10-06 16:06
 2:52:55
2025-10-05 20:57
 1:36:57
2025-10-05 17:21
 1:39:52
2025-10-05 17:25
 1:42:30
2025-10-14 20:27
 1:52:44
2025-10-09 20:16
 2:12:42
2025-10-14 17:28
2025-10-15 06:51
 2:28:56
2025-10-08 21:04
 1:41:57
2025-10-15 14:06
 1:42:11
2025-10-14 21:50
 1:42:59
2025-10-15 16:40
 7:26:60
2025-10-05 20:29
 1:56:45
2025-10-13 11:38
 3:46:00
2025-10-14 19:14
 1:45:08
2025-10-06 12:51
 1:41:27
2025-10-14 22:27
 1:47:17
2025-10-07 09:28
 1:33:34
2025-10-08 12:27
0/0
1:10:48
2025-09-15 18:00
1:27:56
2025-09-16 18:00
1:26:13
2025-09-14 18:00
1:43:47
2025-09-23 18:00
1:31:40
2025-09-12 18:00
1:20:30
2025-10-04 18:00
45:06
2025-10-18 18:00
44:08
Девочки из Эквестрии. Пропуск за кулисы для Сансет (2018) / Equestria Girls. Sunset's Backstage Pass
2025-10-03 18:00
45:08
2025-10-08 18:00
1:29:33
2025-09-29 18:00
1:32:45
2025-10-17 18:02
1:25:17
2025-09-08 18:00
1:13:52
2025-09-17 18:00
1:26:19
2025-09-25 18:00
22:30
2025-09-19 18:00
1:37:06
2025-10-05 18:00
1:14:38
2025-09-28 18:00
1:20:52
2025-10-02 18:00
1:15:39
2025-10-06 18:00
1:33:38
2025-10-09 18:00
0/0