
 2:18
2:18
2023-11-14 22:01

 4:52
4:52

 4:52
4:52
2024-05-07 02:10

 2:44
2:44

 2:44
2:44
2025-02-10 22:52

 4:11
4:11

 4:11
4:11
2024-04-19 15:30

 4:20
4:20

 4:20
4:20
2024-08-23 11:30

 4:55
4:55

 4:55
4:55
2024-08-10 12:00

 1:12
1:12

 1:12
1:12
2025-01-20 13:59

 14:40
14:40

 14:40
14:40
2024-02-01 21:07

 6:50
6:50

 6:50
6:50
2023-12-10 03:16

 7:42
7:42

 7:42
7:42
2024-01-29 17:51

 4:02
4:02

 4:02
4:02
2024-05-04 03:54
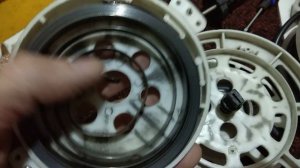
 9:14
9:14

 9:14
9:14
2023-06-23 07:58
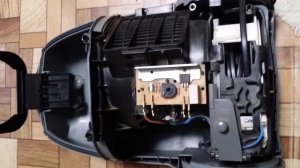
 4:49
4:49

 4:49
4:49
2023-08-24 16:35

 3:09
3:09

 3:09
3:09
2023-05-11 10:57

 2:14
2:14

 2:14
2:14
2020-03-26 17:46

 17:15
17:15

 17:15
17:15
2023-01-05 12:46
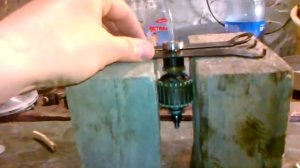
 23:18
23:18

 23:18
23:18
2023-08-20 07:26

 4:37
4:37
![Сергей Одинцов - Девочка любимая (Премьера клипа 2025)]() 3:56
3:56
![Артур Халатов - Девочка моя (Премьера клипа 2025)]() 2:37
2:37
![Selena Gomez - In The Dark (Official Video 2025)]() 3:04
3:04
![Zhamil Turan - Капали (Премьера клипа 2025)]() 3:08
3:08
![ARTEE - Лети (Премьера клипа 2025)]() 3:13
3:13
![Руслан Гасанов, Роман Ткаченко - Друзьям (Премьера клипа 2025)]() 3:20
3:20
![ARTIX - Ай, джана-джана (Премьера клипа 2025)]() 2:24
2:24
![Анна Бершадская - Новая я (Премьера клипа 2025)]() 2:41
2:41
![Светлана Ларионова - Осень отстой (Премьера клипа 2025)]() 3:30
3:30
![Алмас Багратиони - Сила веры (Премьера клипа 2025)]() 3:18
3:18
![Бонухон & Сардорбек Машарипов - Шанс (Премьера клипа 2025)]() 3:28
3:28
![ИЮЛА - Ты был прав (Премьера клипа 2025)]() 2:21
2:21
![Азиз Абдуллох - Аллохнинг айтгани булади (Премьера клипа 2025)]() 3:40
3:40
![Taylor Swift - The Fate of Ophelia (Official Video 2025)]() 3:58
3:58
![Дана Лахова - Одинокая луна (Премьера клипа 2025)]() 2:15
2:15
![Жалолиддин Ахмадалиев - Тонг отгунча (Премьера клипа 2025)]() 4:44
4:44
![Бьянка - Бренд (Премьера клипа 2025)]() 2:29
2:29
![INSTASAMKA - BOSS (Премьера клипа 2025)]() 3:41
3:41
![Любовь Попова - Прощай (Премьера клипа 2025)]() 3:44
3:44
![Азимжон Сайфуллаев - Тупрок буламиз (Премьера клипа 2025)]() 4:38
4:38
![Никто 2 | Nobody 2 (2025)]() 1:29:27
1:29:27
![Девушка из каюты №10 | The Woman in Cabin 10 (2025)]() 1:35:11
1:35:11
![Плохой Cанта 2 | Bad Santa 2 (2016) (Гоблин)]() 1:28:32
1:28:32
![Тот самый | Him (2025)]() 1:36:20
1:36:20
![Порочный круг | Vicious (2025)]() 1:42:30
1:42:30
![Стив | Steve (2025)]() 1:33:34
1:33:34
![Диспетчер | Relay (2025)]() 1:51:56
1:51:56
![Французский любовник | French Lover (2025)]() 2:02:20
2:02:20
![Когда ты закончишь спасать мир | When You Finish Saving the World (2022)]() 1:27:40
1:27:40
![Терминатор 2: Судный день | Terminator 2: Judgment Day (1991) (Гоблин)]() 2:36:13
2:36:13
![Сколько стоит жизнь? | What Is Life Worth (2020)]() 1:58:51
1:58:51
![Лос-Анджелес в огне | Kings (2017)]() 1:29:27
1:29:27
![Положитесь на Пита | Lean on Pete (2017)]() 2:02:04
2:02:04
![Храброе сердце | Braveheart (1995)]() 2:57:46
2:57:46
![Супруги Роуз | The Roses (2025)]() 1:45:29
1:45:29
![Сверху вниз | Highest 2 Lowest (2025)]() 2:13:21
2:13:21
![Плюшевый пузырь | The Beanie Bubble (2023)]() 1:50:15
1:50:15
![Псы войны | Hounds of War (2024)]() 1:34:38
1:34:38
![Обитель | The Home (2025)]() 1:34:43
1:34:43
![Мужчина у меня в подвале | The Man in My Basement (2025)]() 1:54:48
1:54:48
![Приключения Тайо]() 12:50
12:50
![Корги по имени Моко. Домашние животные]() 1:13
1:13
![Синдбад и семь галактик Сезон 1]() 10:23
10:23
![Чуч-Мяуч]() 7:04
7:04
![Новое ПРОСТОКВАШИНО]() 6:30
6:30
![Простоквашино. Финансовая грамотность]() 3:27
3:27
![Команда Дино Сезон 2]() 12:31
12:31
![Мультфильмы военных лет | Специальный проект к 80-летию Победы]() 7:20
7:20
![МиниФорс]() 0:00
0:00
![Монсики]() 6:30
6:30
![Истории Баданаму Сезон 1]() 10:02
10:02
![Шахерезада. Нерассказанные истории Сезон 1]() 23:53
23:53
![Сборники «Простоквашино»]() 1:04:60
1:04:60
![Зебра в клеточку]() 6:30
6:30
![Люк - путешественник во времени]() 1:19:50
1:19:50
![Полли Покет Сезон 1]() 21:30
21:30
![Команда Дино Сезон 1]() 12:08
12:08
![Отважные мишки]() 13:00
13:00
![Приключения Пети и Волка]() 11:00
11:00
![Папа Супергерой Сезон 1]() 4:28
4:28

 4:37
4:37Скачать видео
| 256x144 | ||
| 640x360 | ||
| 1280x720 | ||
| 1920x1080 |
 3:56
3:56
2025-10-28 11:02
 2:37
2:37
2025-10-28 10:22
 3:04
3:04
2025-10-24 11:30
 3:08
3:08
2025-10-22 14:26
 3:13
3:13
2025-10-18 09:47
 3:20
3:20
2025-10-25 12:59
 2:24
2:24
2025-10-28 12:09
 2:41
2:41
2025-10-22 14:02
 3:30
3:30
2025-10-24 11:42
 3:18
3:18
2025-10-24 12:09
 3:28
3:28
2025-10-24 11:20
 2:21
2:21
2025-10-18 10:16
 3:40
3:40
2025-10-18 10:34
 3:58
3:58
2025-10-17 11:48
 2:15
2:15
2025-10-22 14:16
 4:44
4:44
2025-10-19 10:46
 2:29
2:29
2025-10-25 12:48
 3:41
3:41
2025-10-23 13:04
 3:44
3:44
2025-10-21 09:25
 4:38
4:38
2025-10-23 11:27
0/0
 1:29:27
2025-09-07 22:44
 1:35:11
2025-10-13 12:06
 1:28:32
2025-10-07 09:27
 1:36:20
2025-10-09 20:02
 1:42:30
2025-10-14 20:27
 1:33:34
2025-10-08 12:27
 1:51:56
2025-09-24 11:35
 2:02:20
2025-10-01 12:06
 1:27:40
2025-08-27 17:17
 2:36:13
2025-10-07 09:27
 1:58:51
2025-08-27 17:17
 1:29:27
2025-08-28 15:32
 2:02:04
2025-08-27 17:17
 2:57:46
2025-08-31 01:03
 1:45:29
2025-10-23 18:26
 2:13:21
2025-09-09 12:49
 1:50:15
2025-08-27 18:32
 1:34:38
2025-08-28 15:32
 1:34:43
2025-09-09 12:49
 1:54:48
2025-10-01 15:17
0/0
 12:50
12:50
2024-12-17 13:25
 1:13
1:13
2024-11-29 14:40
2021-09-22 23:09
 7:04
7:04
2022-03-29 15:20
 6:30
6:30
2018-04-03 10:35
 3:27
3:27
2024-12-07 11:00
2021-09-22 22:40
 7:20
7:20
2025-05-03 12:34
 0:00
0:00
2025-10-28 13:02
 6:30
6:30
2022-03-29 19:16
2021-09-22 21:29
2021-09-22 23:25
 1:04:60
2025-09-02 13:47
 6:30
6:30
2022-03-31 13:09
 1:19:50
2024-12-17 16:00
2021-09-22 23:09
2021-09-22 22:29
 13:00
13:00
2024-11-29 13:39
 11:00
11:00
2022-04-01 17:59
2021-09-22 21:52
0/0

